What’s new at Inera and around the industry
September 2020 Newsletter

Find XUG updates, Word Tips, and more in our September 2020 Newsletter!
Welcome to our new website!
No shade to our old website, but it’s time for a change.
Last week we launched an updated design, a more user-friendly structure, and even some brand-new content on inera.com, and we hope you’ll like it as much as we do!
Our blog and our newsletter now have their own independent spaces; we’ve reorganized our case studies, publications, events, and support pages, and we’ve integrated links to educational content throughout the site, so visitors can learn more about whatever they’ve come for from wherever they are.
And for those who need answers to one of our most frequently asked questions, we’ve added a brand-new section: Why XML?
XUG news
 We hope you’ll join us in our online meeting space on October 20 & 21 for plenary sessions (including the ever-popular New eXtyles Features and Industry Updates talks), customer presentations, concurrent sessions, and social events!
Watch our XUG page for agenda and registration updates. Registration will open this month, so keep your eyes peeled!
Optimizing Word for eXtyles: Q&A
Thanks to everyone who attended our first webinar, “Optimizing Word for eXtyles”! We especially enjoyed seeing attendees sharing Word tips and tricks in the live chat.
We weren’t able to get to all the questions, so we’ve put together a Q&A for attendees (and anyone else who may be interested). Check it out on the Inera blog!
If you haven’t done so already, sign up for our mailing list to get updates on upcoming webinars.
Bring on the data citations!
In a recent blog post, we talked about the process of building preprint citation handling into eXtyles Reference Processing. But that’s not all we’ve been working on!
Starting with Build 4613, you’ll see two new behaviors in eXtyles Reference Processing: first, eXtyles can now parse citations to data sets; and, second, we’ve updated and improved how eXtyles verifies DOIs.
Word Tips: A quicker and easier Save As
Once upon a time in the late 1990s, your roving reporter used Word’s Save As command so often that adding a custom-pixel-drawn Save As button to the toolbar seemed like a sensible use of time. Fortunately, current versions of Word make quick access to Save As much easier to achieve!
As we’ve discussed before, one great thing about the Word interface is that it usually provides several different ways to do the thing you want to do. Save As is no exception! The standard or default method is File>Save As; here are three more options that will save you some clicks.
Option 1: Keyboard shortcuts
The default keyboard shortcut for Save As is F12 (depending on your keyboard, you may need to hold down the Fn key first).
Don’t like F12? Fear not! You can change the keyboard shortcut to something you find easier to remember, using the instructions here (with the command File>Save As and your preferred keyboard shortcut).
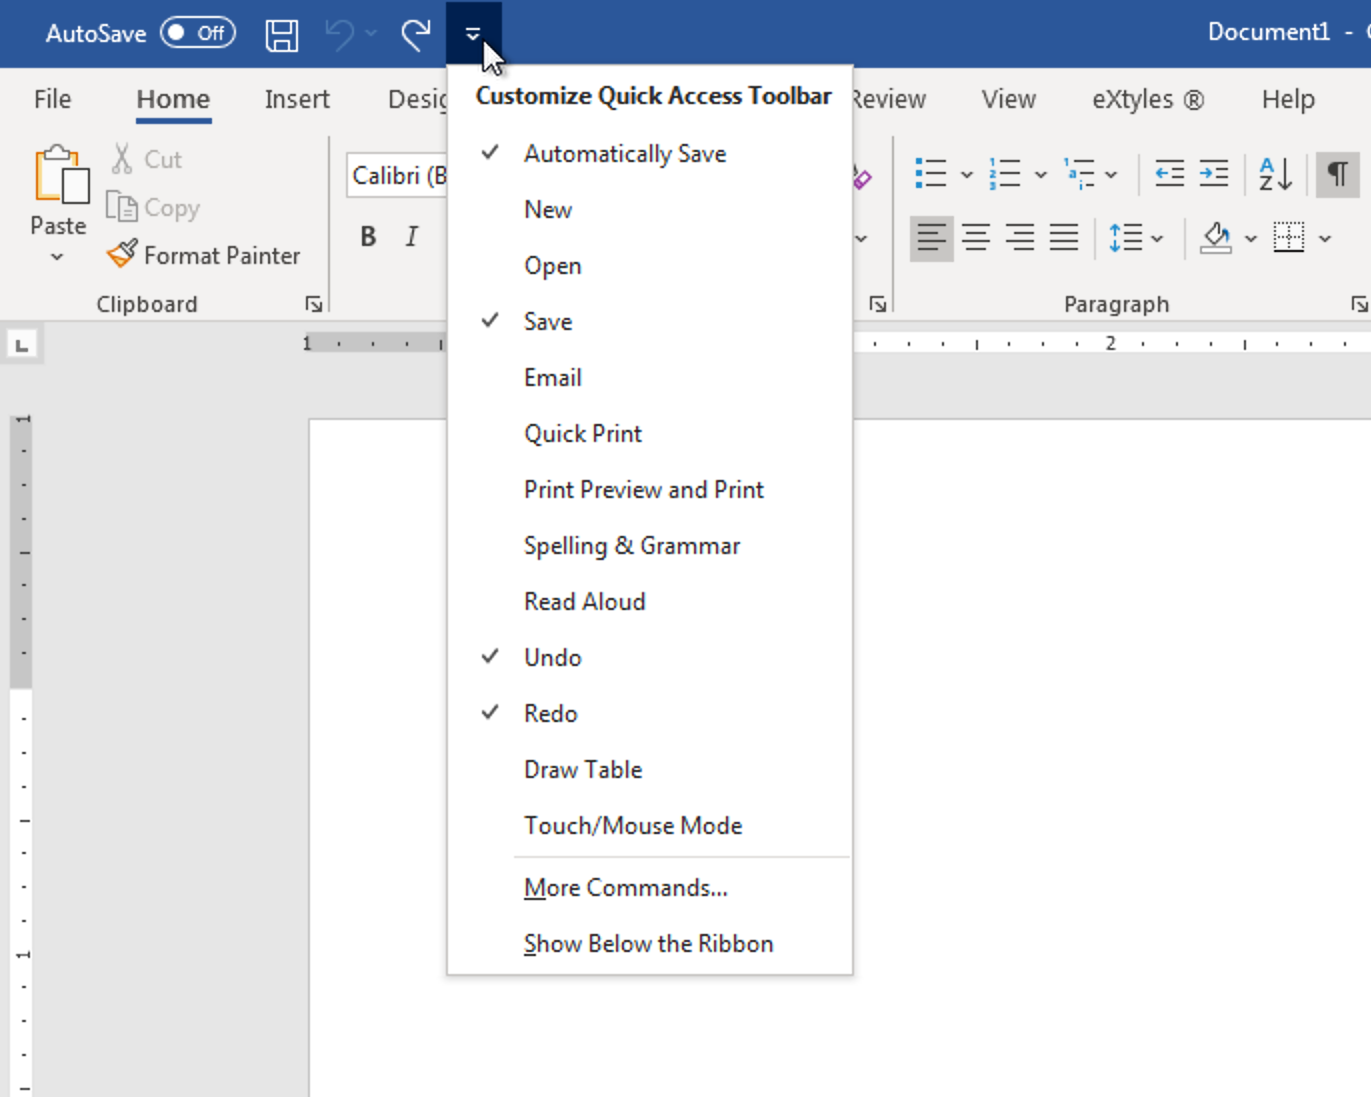
Option 2: The Quick Access Toolbar
Having Save As on your Quick Access toolbar makes it available to you no matter which ribbon tab is showing.
Here’s how to add a button to the Quick Access toolbar:
- Open the Customize Quick Access Toolbar dropdown menu (shown below) and choose More Commands.
- From the Choose commands from: dropdown, choose Popular Commands, then scroll down the alphabetical list until you find Save As. Click on Save As in the left-hand box to select it, then click the Add>> button to move it to the right-hand box.
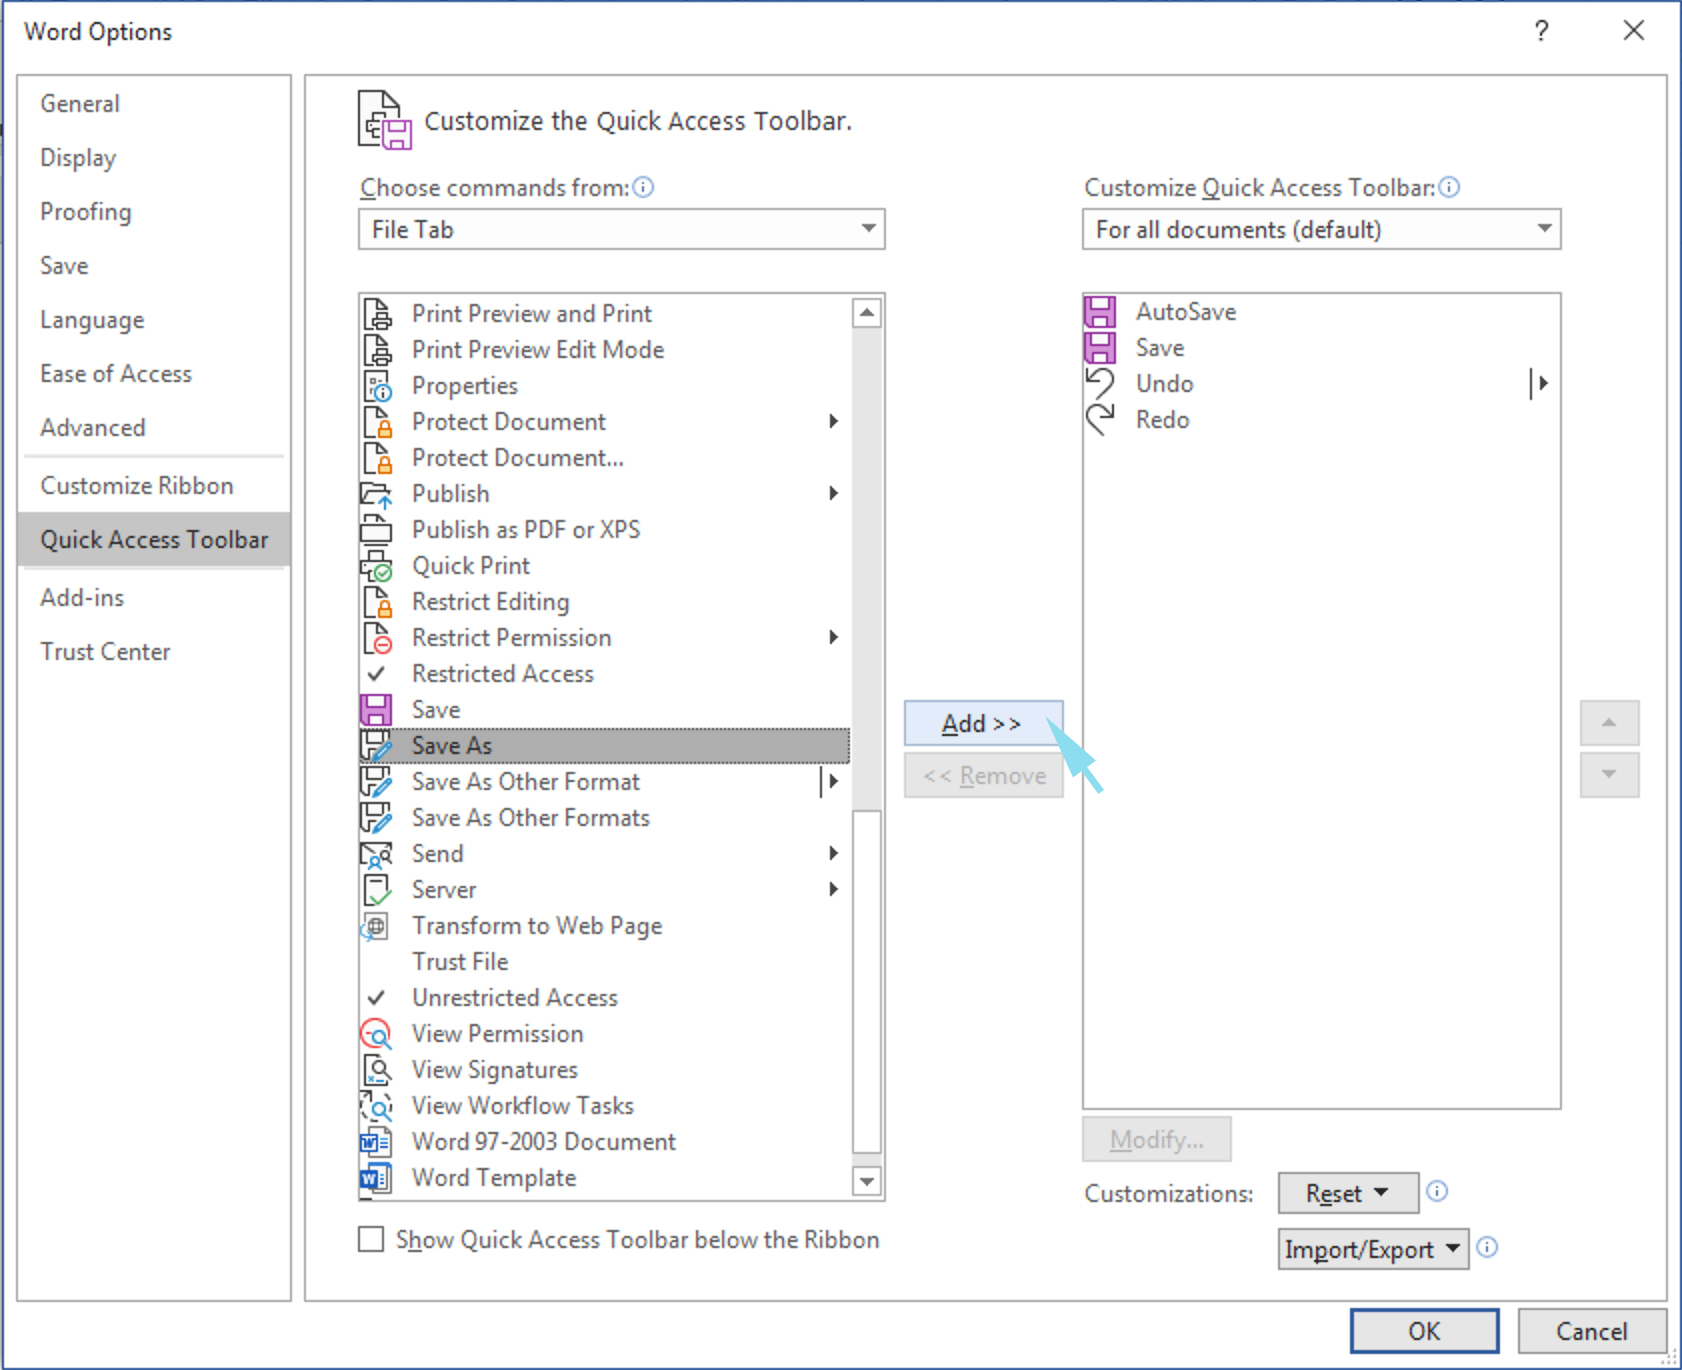
- Click OK. Your Quick Access Menu should now include the Save As button:

Option 3: The Home tab
You can also add the Save As button to the Home tab, or to another tab of your choice. The Microsoft Knowledge base shows you how to customize the Word ribbon, and it’s worth learning: once you’re comfortable with the process, you can use these steps to add other frequently used buttons to your Word tabs (and to remove ones you never use)!
Have an intractable Word problem you’d love to solve? Have a clever tip to share? Send it to us at [email protected] (subject line: Word Tips)!