What’s new at Inera and around the industry
October 2020 Newsletter

Find webinar links, the XUG agenda, Word Tips, and more in our October 2020 Newsletter!
Counting down to #XUG2020
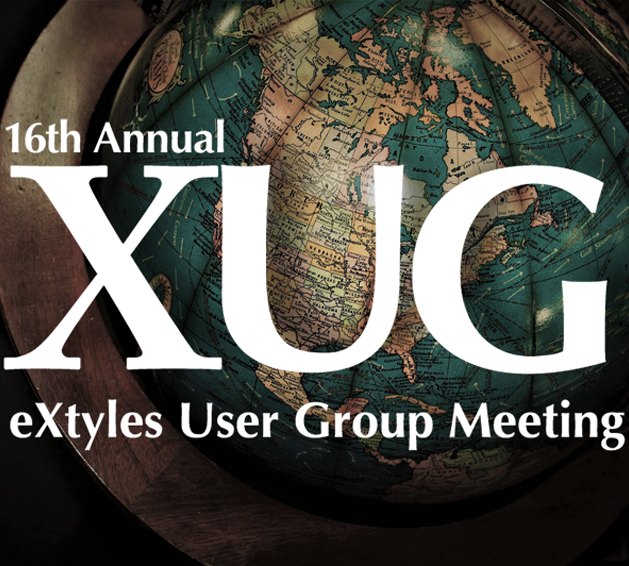 The 16th annual eXtyles User Group meeting is happening next week! And thanks to this year’s online format, you can still register for XUG and attend in real time or on your own time.
This year’s XUG agenda has something for everyone, including
- In-depth looks at what’s new with eXtyles and Inera
- Customer presentations on managing a geographically distributed team, handling a surge in article submissions, and switching from ISOSTS to NISO STS
- Sessions with practical tips and tricks for eXtyles end users
- “Flash talks” from eXtyles customers around the world
- Informal networking opportunities
- A chance to have fun and win prizes with #eXtyles20th trivia and XUG Bingo ????
Still not convinced? Here’s why we think you should come to XUG Online.
Inera around the web
Free via SSP OnDemand: “Flagging Predatory Journals to Fight ‘Citation Contamination.’” Inera’s Liz Blake joins Kathleen Berryman of Cabells to demonstrate an innovative collaboration designed to help publishers combat “citation contamination” by identifying citations to predatory journals. The webinar is available now to watch on your own schedule, or join us on November 12 at 11:00 am Eastern for a live screening with real-time chat and Q&A!
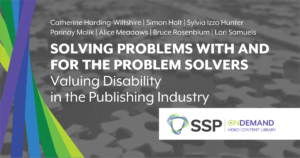 “Solving Problems with and for the Problem Solvers: Valuing Disability in Scholarly Publishing,” featuring Inera’s Bruce Rosenblum and Sylvia Izzo Hunter with Catherine Harding-Wiltshire (BMJ), Simon Holt (Elsevier), Parinay Malik (Fidelity Investments), and Lori Samuels (NBCUniversal Media), is also now available for free on SSP’s OnDemand platform!
In a guest post on the Scholarly Kitchen blog, Inera’s Sylvia Izzo Hunter, Igor Kleshchevich, and Bruce Rosenblum report on what we learned from updating our reference processing code to handle citations to preprints, and what we think our industry needs to do about it.
![]() This year the Short Course for Manuscript Editors from the Council of Science Editors, featuring Inera’s Liz Blake, is happening on October 16 as part of CSE’s Fall 2020 Virtual Symposium.
This year the Short Course for Manuscript Editors from the Council of Science Editors, featuring Inera’s Liz Blake, is happening on October 16 as part of CSE’s Fall 2020 Virtual Symposium.
What we’re reading: Thoughts on the lifecycle of journals
Journals come and go (and sometimes change their names). What factors really prompt the creation of new journals? What happens to the content of an online-only journal when it ceases publication? We found lots to think about, on these topics and others, in these two articles.
Writing in Repositorio Español de Ciencia y Tecnología, Urbano et al. ask, “Why are new journals created?” They looked at new journals in the field of information documentation created between 2013 and 2018, examining their characteristics, their approaches to the discipline, various success metrics, and the stated reasons behind their creation—as well as what the profile of this group of journals says about the discipline. Among their conclusions: “A significant number of titles are created without clearly stating the purpose and objectives pursued.”
On arXiv.org, Laakso et al. set out to investigate an unanswered question at the other end of the journal lifecycle: the phenomenon of “vanished journals.” They found, despite the proliferation of journal archiving initiatives, that “a total of 176 [journals] vanished from the web between 2000–2019, spanning all major research disciplines and geographic regions of the world.” While it’s not only OA journals that vanish, the authors note that “OA journals seem to participate in preservation schemes at an alarmingly low rate.”
Word Tips: Three ways to improve your relationship with spellcheck
Whether you love Word’s spell-checking feature or hate it, here are three ways to make it work better with your content!
→ eXtyles users: The eXtyles Auto-Redact feature can help solve your spelling and spellcheck issues! To discuss implementing Auto-Redact or expanding your Auto-Redact rule set, contact us at [email protected].
1. Get the most out of the Custom dictionary
While you can’t directly edit Word’s default dictionaries, you can add words to the Custom dictionary in at least three different ways! Custom dictionaries can supplement and even override the default.
First, you can add one word at a time to your default Custom dictionary.
→ Tip: To identify your default Custom dictionary, see method 2 below.
In this example, two words are underlined by spellcheck, but only one is misspelled:

To add the correct spelling to the Custom dictionary, right-click on the first “misspelled” word and choose “Add to dictionary” from the dropdown menu:
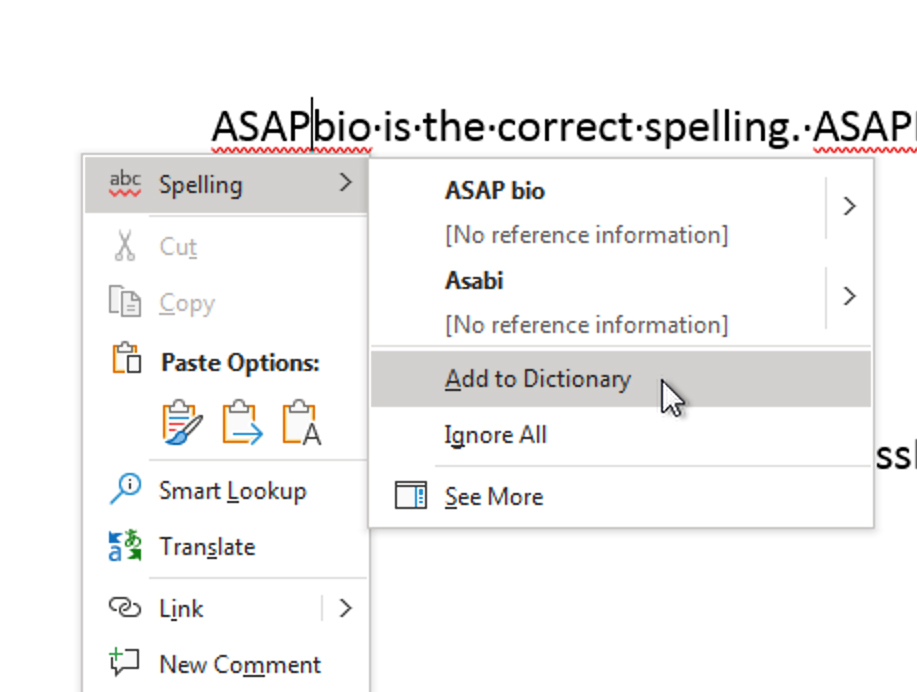
You should now see only the incorrect spelling underlined:

→ Tip: If you’ve accidentally added a misspelling to your default Custom dictionary, see the steps below!
Second, you can add words to your default custom dictionary via File>Options>Proofing>Custom Dictionaries:
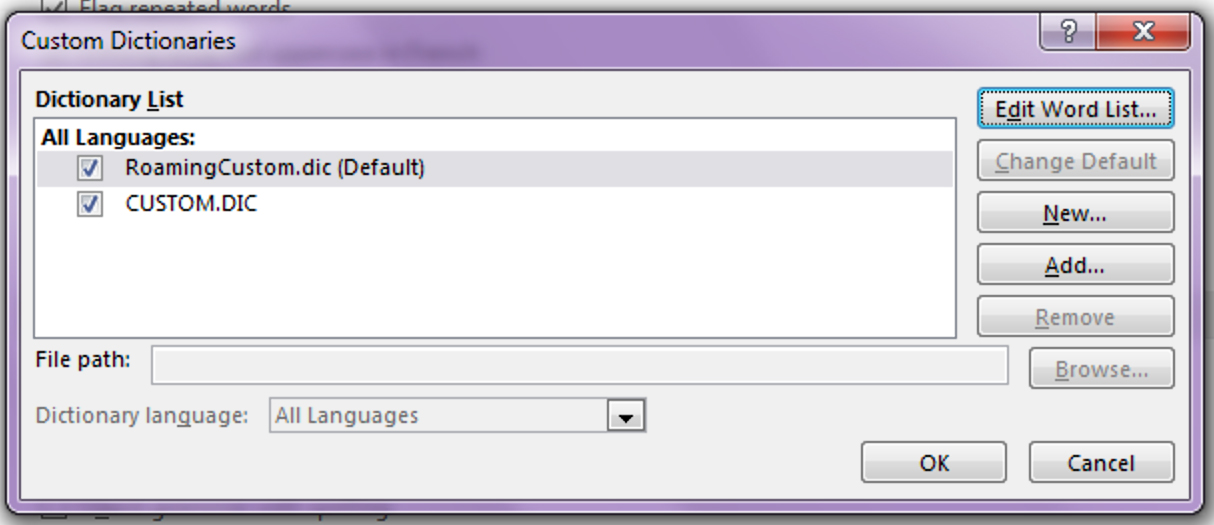
→ Tip: From this dialog, you can also change which custom dictionary is the default, add a new custom dictionary, or remove an existing one.
Select the default custom dictionary (it will always be the one at the top of the list!) and click Edit Word List to bring up the editing dialog:
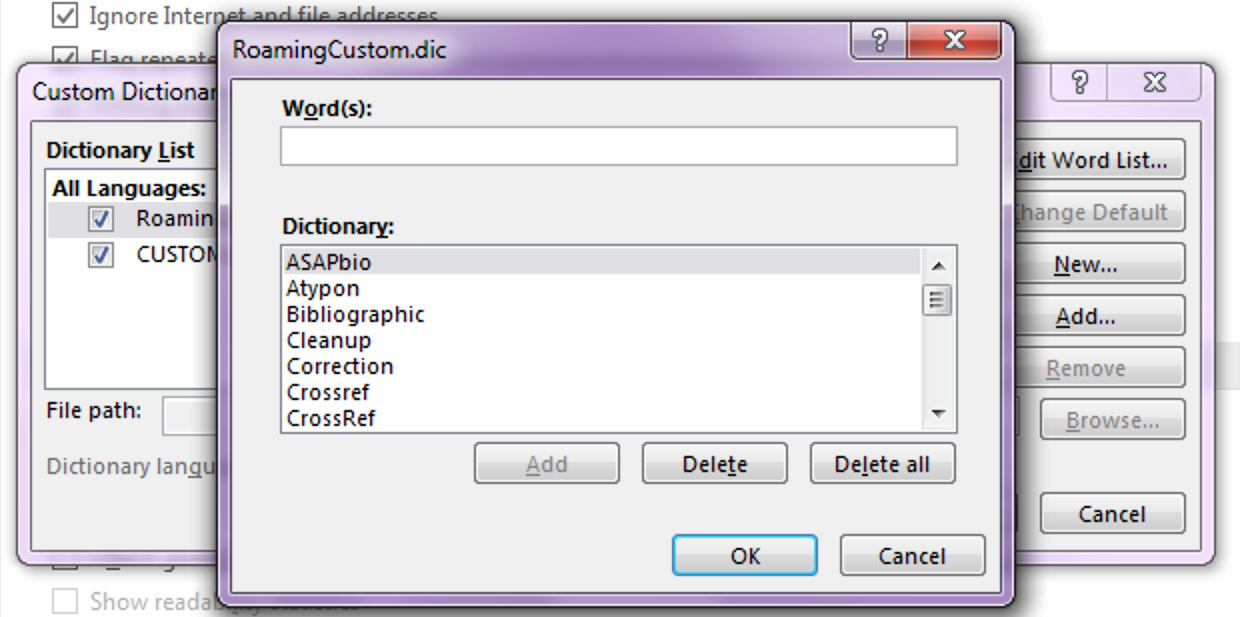
To add a new word, type it into the Word(s): box, then click Add, then OK.
→ Tip: This is also where you can correct or delete that misspelled word you accidentally added to the dictionary! For example, the observant reader will have noticed that it’s time for your roving reporter to remove the original (CrossRef) spelling of Crossref from her custom dictionary file.
Your third option, and your best bet if you need to add a long list of words to your default Custom dictionary, is to open up the .dic file in Notepad and edit it directly. (The Custom Dictionaries dialog shown above may or may not provide a drive path. If not, search for the filename on your computer; where it’s stored will depend on which dictionary is your default.)
2. Learn to edit Word’s Exclude lists
Sometimes what you want isn’t to stop Word from marking an acceptable term as incorrect, but to make it recognize and flag an incorrect or outdated spelling—or a spelling that you just don’t want to use in your content—so that you can more easily spot and fix it:

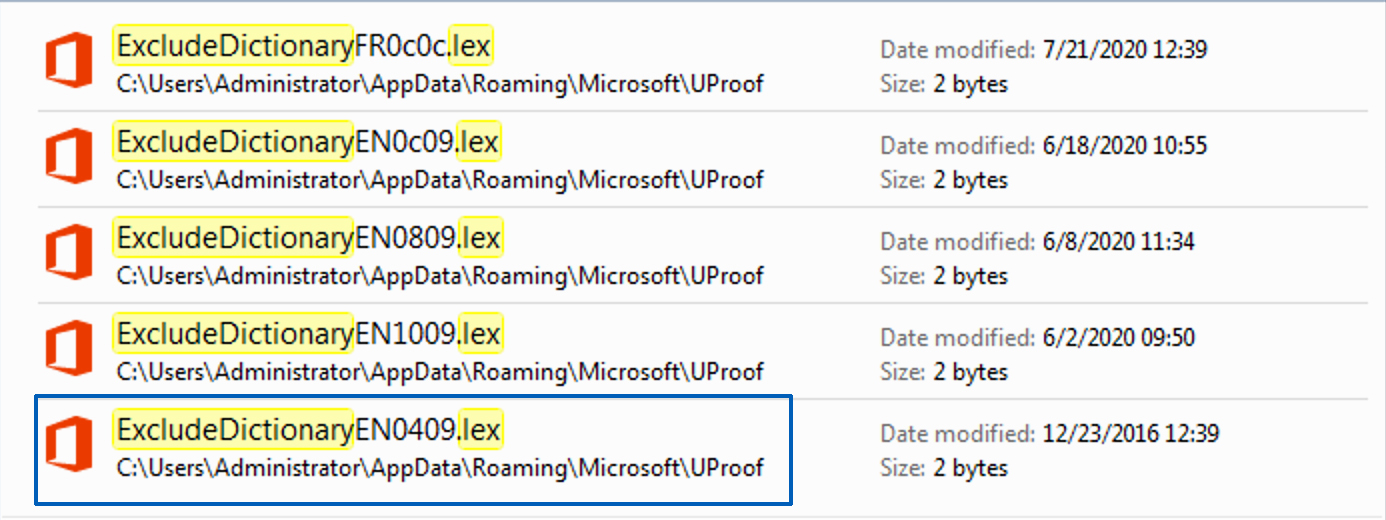
Fear not! For each of Word’s uneditable Dictionary (*.dic) files, there’s a corresponding Exclude Dictionary file that you can edit with ease in Notepad … once you’ve managed to find it.
The Exclude Dictionary files are all stored together. To find them, search your computer for files beginning with ExcludeDictionary and ending with .lex (i.e., search for ExcludeDictionary*.lex).
Now comes the tricky bit! Between those two elements are two more: a 2-letter language code (for English, this will be EN) and a 4-character ID code that specifies which version of that language the Exclude Dictionary applies to. Microsoft maintains a publicly accessible list of these codes; you can download the most current list from this page. To find the 4-character ID code, first find your language (e.g., English) in column 1, then find your desired geographical location (e.g., United States) in column 2, then look at the last 4 characters of the 6-character code in column 3 (in this case, 0x0409 → 0409).
In other words: to exclude unwanted spellings from Word’s US English dictionary, you’ll need to edit the file ExcludeDictionaryEN0409.lex:
Right-click and choose Open With: > Notepad to edit the file—just type or paste in the words you want to exclude, making sure to separate them with a hard return.
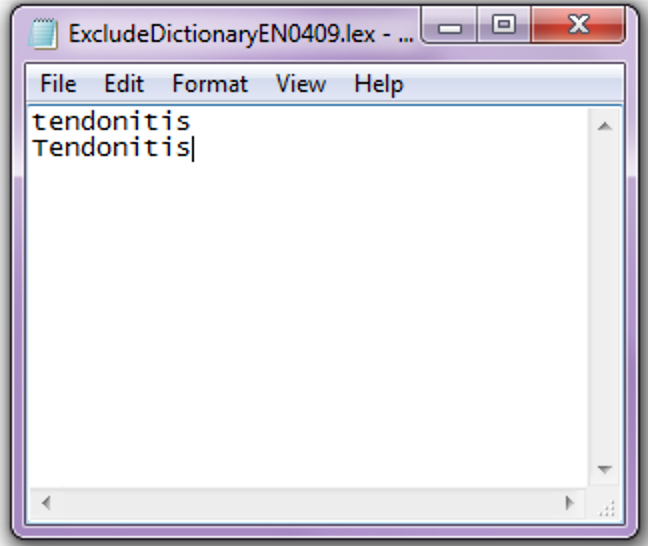
→ Tip: You’ll need to add all forms of each word you want to exclude, including plural and possessive forms.
Save and close the .lex file, close all open Word windows, reopen Word, and voilà! Word now identifies your excluded terms as misspelled.

3. Take control of Word’s language settings
It’s easier than you think! Current versions of Word can show the language setting right on the Status Bar, and you can change it from the same location (as well as via the Review tab on the Word ribbon):

Sometimes Word makes decisions about language settings without telling you. If you’re getting a lot of erroneous wavy red underlining in one part of your document, check the active language setting for that paragraph or section!
You can also make spellcheck more useful by changing the language setting to match the language of a quoted passage—even if the difference is between such close cousins as US and UK English.
Have an intractable Word problem you’d love to solve? Have a clever tip to share? Send it to us at [email protected] (subject line: Word Tips)!