What’s new at Inera and around the industry
November/December 2021 Newsletter
Wrapping up XUG 2021
![]() If you came to XUG 2021, thank you! We hope you enjoyed it as much as we did. If you didn’t, or weren’t able to attend the whole meeting, check out our annual “What happened at XUG” blog post for a whirlwind tour.
If you came to XUG 2021, thank you! We hope you enjoyed it as much as we did. If you didn’t, or weren’t able to attend the whole meeting, check out our annual “What happened at XUG” blog post for a whirlwind tour.
HASP key compatibility with Windows 11
If your configuration of eXtyles requires the use of a HASP key (USB hardware dongle), you should recently have received a technical bulletin from eXtyles Support regarding a compatibility issue with Windows 11.
The developer of the HASP software protection technology that eXtyles uses has informed us that the keys we use are not compatible with Windows 11. This means that if your organization upgrades to Windows 11, you will need to maintain a Windows 10 environment to continue using eXtyles.
We’re in active discussions with the HASP technology developer to understand what their plan is for supporting Windows 11, and we’ll update HASP key users with new information as it arrives.
Meanwhile, please contact eXtyles support with any questions or concerns.
Inera team news
 In October—just before XUG Online—we welcomed two new members to the Inera team: Gianna Flores and Christine Benson!
Gianna is an IT wiz, joining our Services Team as an Editorial Software Support Specialist. She’ll be doing all things customer support—troubleshooting, software analysis, and technical support.
Christine is also joining our Services Team. As our Editorial Quality Assurance Specialist, she’ll be working on everything QA, from testing routine software updates to bug fixes to Edifix updates, and will be helping to keep our user documentation complete and up to date.
What we’re reading: That’s CORREC
Because we work so much with citations and references at Inera, we talk a lot about retractions and corrections. And it’s not just us! For an inside look at the new NISO project CORREC (the acronym stands for Communication of Retractions, Removals, and Expressions of Concern) and where it came from, we recommend “Actions on retractions: An interview with Jodi Schneider” on the Scholarly Kitchen blog, as well as the final recommendations of the RSIRS project (Reducing the Inadvertent Spread of Retracted Science).
*
We also recommend these two guest Scholarly Kitchen posts, which should give all of us food for thought regarding our recruiting, hiring, and onboarding practices: “Some perspectives on disability disclosure in the publishing industry,” by Simon Holt and Erin Osborne-Martin, and “Job hunting with an ‘invisible’ disability: A conversation,” by Katy Alexander and Inera’s Sylvia Izzo Hunter (who is not job hunting).
Find Inera at upcoming (online) conferences
 ► NISO Plus 2022
February 15-17
Word Tips: Saving and finding your files more easily
ℹ️ Our Word Tips are tested on recent versions of Word for Windows. If you are using Word for Mac, which has a smaller feature set, your mileage may vary.
Windows and Word have their own ideas about where you should want to find and save your files, and sometimes those defaults create a lot of unnecessary clicking. Here’s how you can adjust those settings to suit your own needs!
The Default Document Location—as its name suggests—is where Word will go first when you use the Save or Save As command. To change this setting, follow these steps:
- Go to File > Options > Advanced.
- Scroll down to the General section of the Advanced dialog:
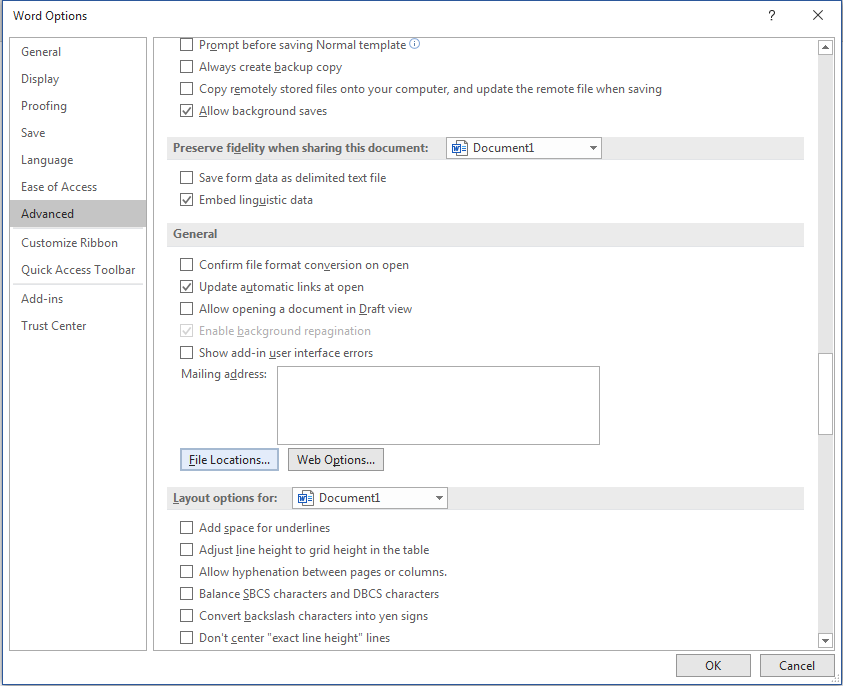
- Click the File Locations button (hotkey: F) to open the File Locations dialog:
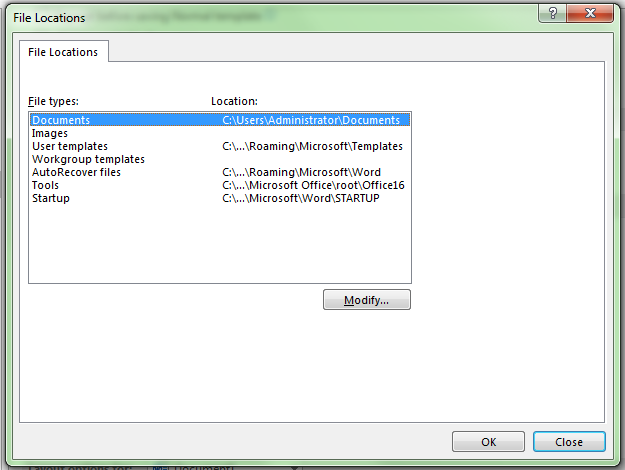
- In the File types: box (hotkey: F), select Documents, then click Modify (hotkey: M).
- Choose the folder (directory) you want, then click OK to return to the File Locations dialog. The folder you just chose should now appear in the Location:
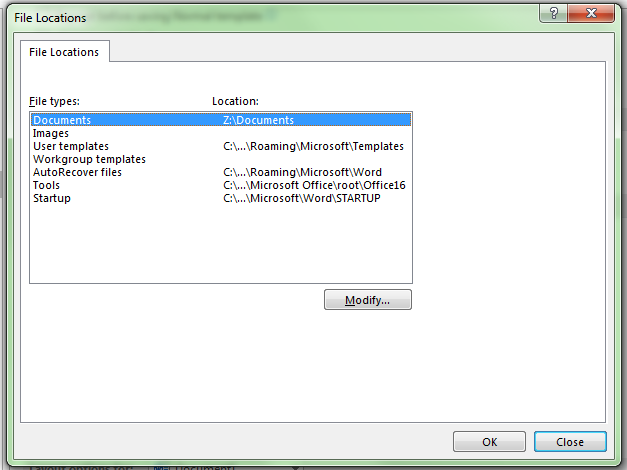
- Click OK. (Keep clicking OK until you run out of dialog boxes; they’re nested like matryoshka dolls.)
→ Bonus Tip: You can also change other default directories, including User templates (this governs where Word will look for templates) and AutoRecover files (this controls where Word will save its AutoRecover files).
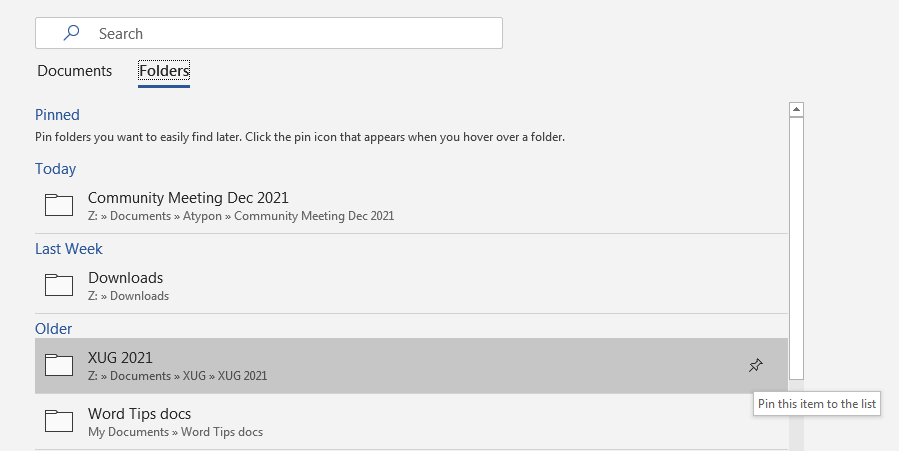
You might also want to pin frequently accessed folders/directories so that they always come up when you use the Open command. You can do this on Word’s File>Open menu by clicking the Folders tab and then right-clicking the folder you want to pin:
Have an intractable Word problem you’d love to solve? Have a clever tip to share? Send it to us at [email protected] (subject line: Word Tips)!