What’s new at Inera and around the industry
November-December 2018 Newsletter

Snow and metadata are in the air! #XUG2018, #CRLIVE18, new blog posts, the last Word Tip of 2018, and more in the November/December 2018 Newsletter!
XUG 2018: Food for thought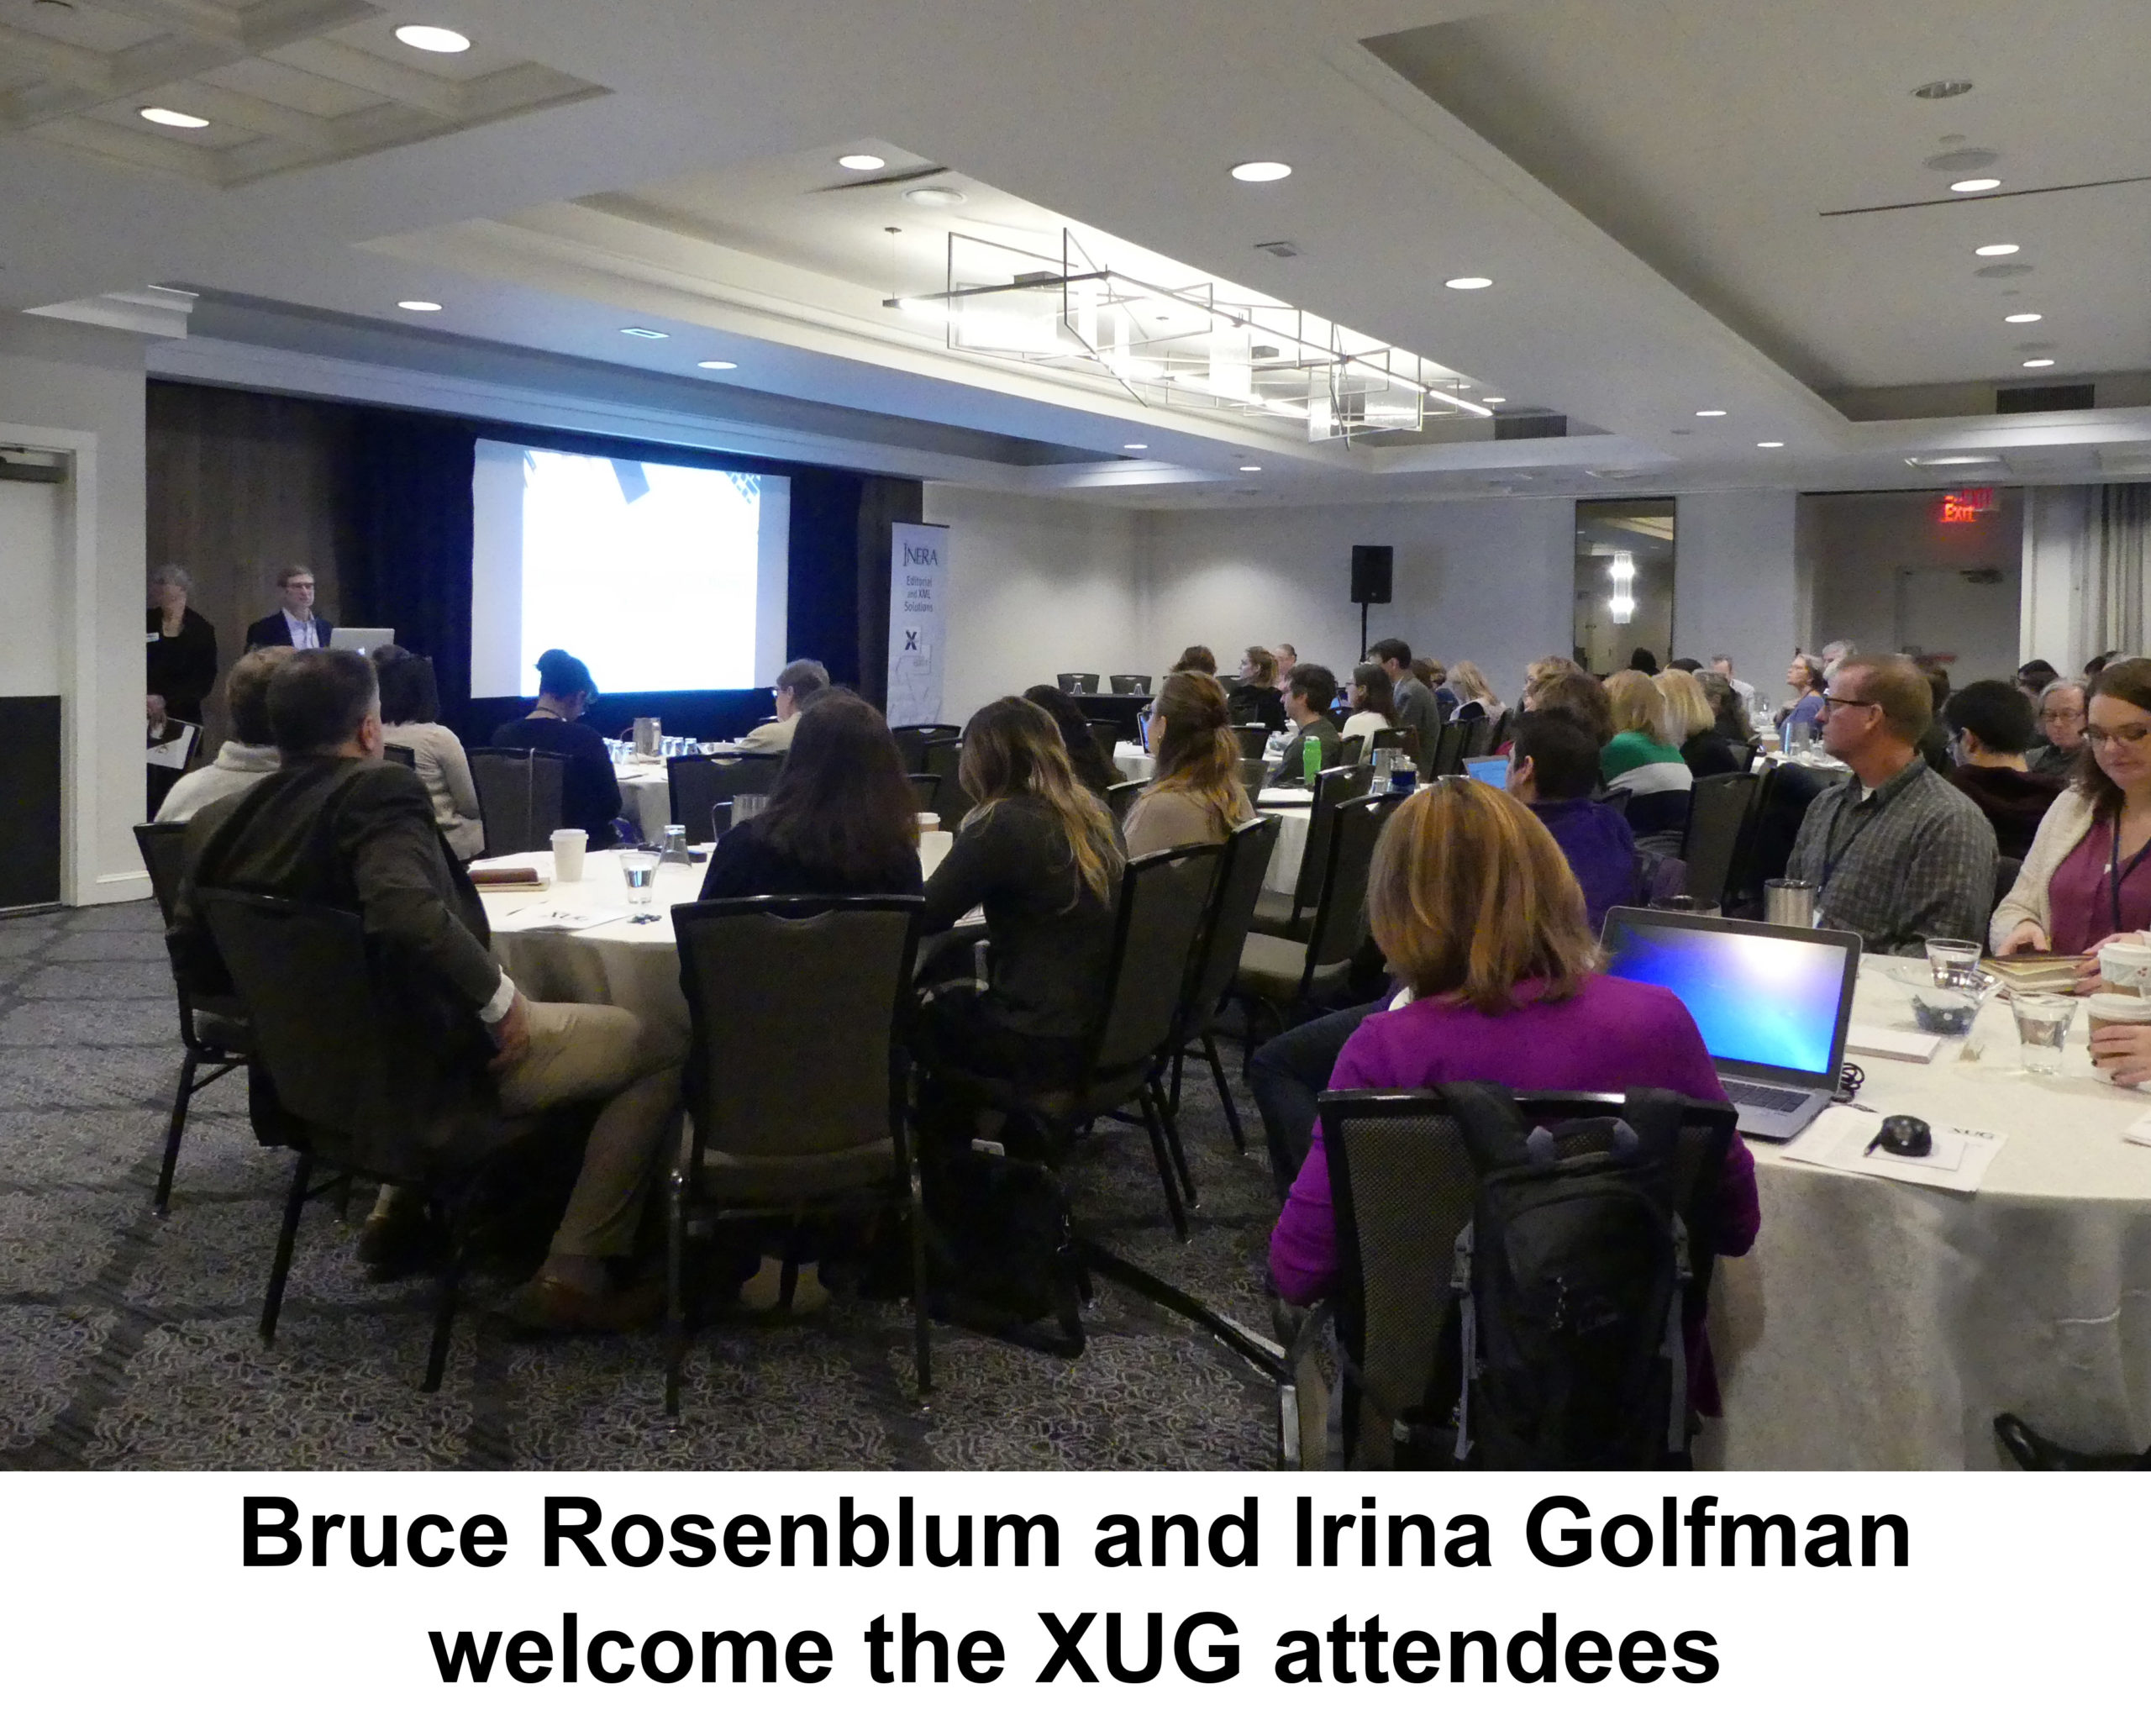
The reviews are in, and the 14th annual eXtyles User Group Meeting—held in Boston on November 8—may have been our best XUG yet!
Innovations for this year included our first-ever concurrent sessions, a fresh approach to breakout tables, and, to our great delight, our biggest crop of first-time attendees since the very first XUG.
 You can read all about XUG 2018 on our blog and via the hashtag #XUG2018 on Twitter! You’ll also find links to the XUG presentation slides on our XUG page.
Collaboration at work: Editorial Manager 15.0, featuring eXtyles Metadata Extraction
This fall Aries Systems deployed Editorial Manager 15.0, which uses Xtract—also known as eXtyles Metadata Extraction—for all journals on the platform. This technology uses artificial intelligence to analyze author-submitted documents; extract the article title, author names, abstract, affiliations, and other metadata; and convert all this metadata into richly tagged JATS XML. Based on this XML file, Editorial Manager automatically populates submission fields, so that authors can simply review and verify their article metadata rather than laboriously entering it by hand.
What do their users think? Jessica E. McEwan, Managing Editor of the Journal of Vascular Surgery Publications, writes:
The new submission process is intuitive, provides plenty of room for customized instructions, and propels authors toward the submission finish line by focusing more on the files to be uploaded than on rekeying basic information that has already been captured.
Want to learn more? See the XUG talk on Xtract from Charles O’Connor of Aries Systems, or contact us at [email protected].
#CRLIVE18: We are Crossref
Our Marketing Manager, Sylvia Izzo Hunter, attended the annual CrossrefLIVE event in Toronto in mid-November. This year’s theme—“How good is your metadata?”—was right up our street, and we enjoyed the opportunity to catch up with customers and partners and to learn more about ongoing metadata initiatives such as FAIR Data and Metadata 2020! In addition, we were delighted to present a poster outlining how our longstanding collaborations with Crossref contribute to a better metadata landscape, and to learn from other participants’ posters.
Some key takeaways from #CRLIVE18:
- When answering the question “How good is your metadata?” publishers need to consider not only how much metadata they provide (the number of metadata
elements deposited) but also how accurate those metadata are. You might be surprised to learn how many parts of the scholarly ecosystem rely on
your metadata! - Data—where to store it, how to store it, who should have access to it, how to cite it, how to identify it for others to cite—continues
to be a hot topic! We’re following developments in this area with interest. - As scholarly communications continue to expand beyond the traditional journal and book formats, some trust issues have developed. Is metadata the new
signal of trust?
In the <News/>
On the Inera blog:
- “JATS 1.2 & CRediT Markup Explained” tackles some frequently asked questions about the interaction between JATS and CRediT.
- “Empathy + Reproducibility” takes you inside Inera’s Support Team for a look at how we put our customer support philosophy into practice!
New data on article retractions
We recommend this Science article by Jeffrey Brainard and Jia You, which looks at the new Retraction Watch database and what (sometimes surprising!) patterns are revealed by its contents.
Word Tip: Using Outline view to reorganize your document
Do you ever look at a document and think, This would make so much more sense if we swapped section 6 with section 3? Do you frequently find yourself having to move the references before the endnotes, or the acknowledgements from the beginning to the end? Word’s Outline View makes it easy to move around sections of your document without endless scrolling, selecting, cutting, and pasting (and the resulting potential for slip-of-the-mouse errors)!
The key to success here is the appropriate use of styles—those stored in your eXtyles template or those built into Word—and the Outline level dropdown in the Home>Paragraph>Indents and Spacing dialog.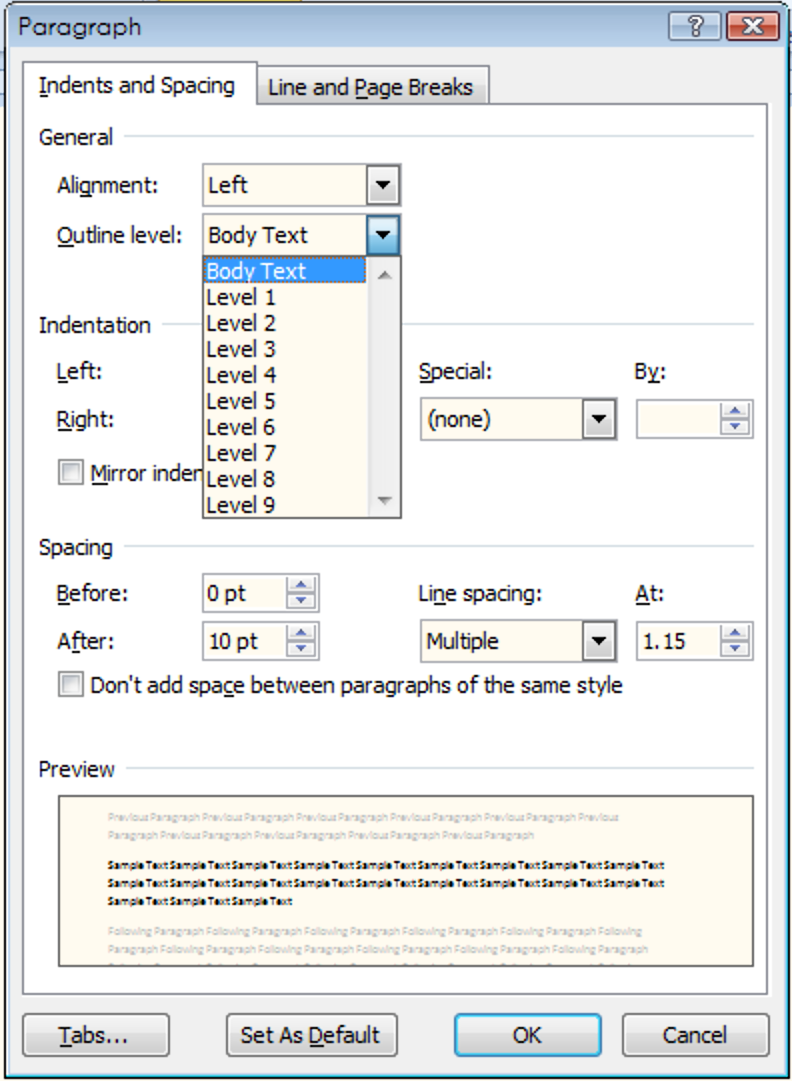
Every paragraph’s Outline level is built into its paragraph style. For most paragraphs, the level will be Body Text, but the Outline level dropdown also offers 9 heading levels! This is what allows you to use Outline View to move document sections around, and that’s why this Word Tip focuses specifically on heading styles (your own or those built into Word).
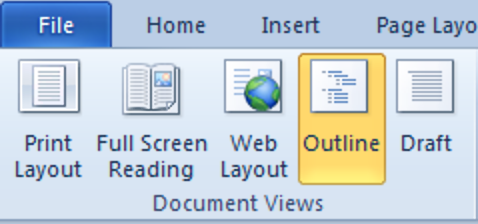
To start using the power of Outline levels to rearrange your content, open up Outline View on the View tab:
When you switch to Outline view, one of two things will happen, depending on whether you have the Outlining tab enabled.
If Outlining is enabled, Word will immediately open the Outlining tab when you switch to Outline view:
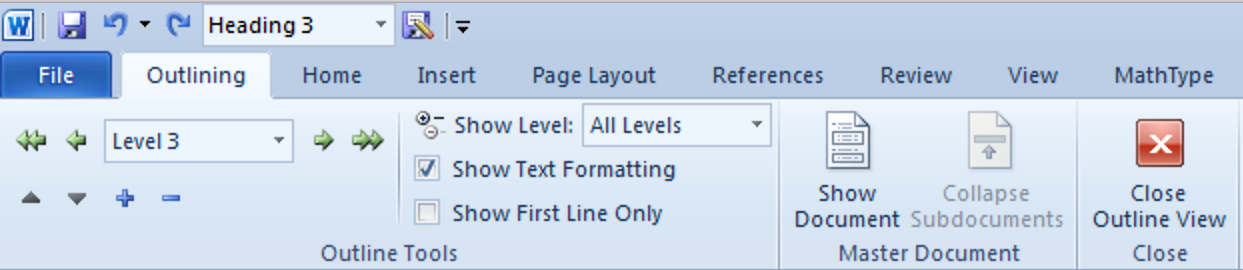
The Outlining tab gives you a number of tools and options for viewing and manipulating your document content; for more info on using these tools, see here. For now, we’re going to keep it simple!
If Outlining is not enabled, you’ll see the view shown in the screenshot below, which you can use to move sections of your document around by simply dragging and dropping!
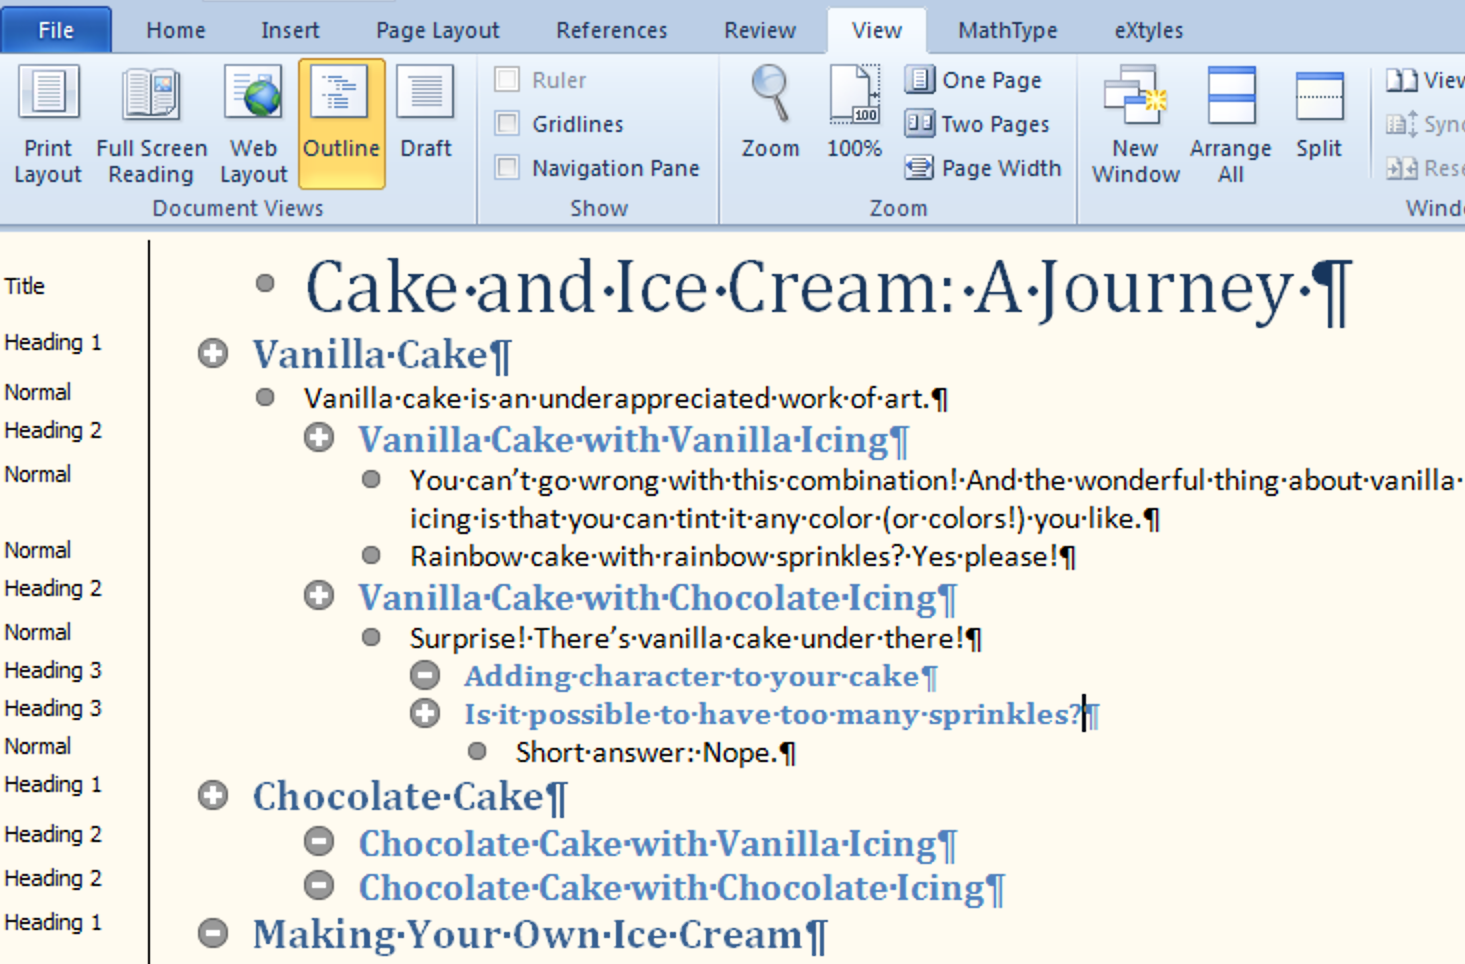
In this screenshot, which uses Word’s built-in paragraph styles, we have the Styles pane showing to make the different heading levels even easier to identify. You’ll also see three different types of gray circles attached to the text and heading paragraphs. A small gray circle indicates a paragraph whose Outline level value is “Body Text”. A larger circle with a minus sign indicates a heading with no subordinate headings or paragraphs; a circle with a plus sign indicates a heading with subordinate headings. (If you’re used to web navigation that uses plus and minus signs to indicate expanding and collapsing sections, you may find this a bit confusing—we sometimes do too!)
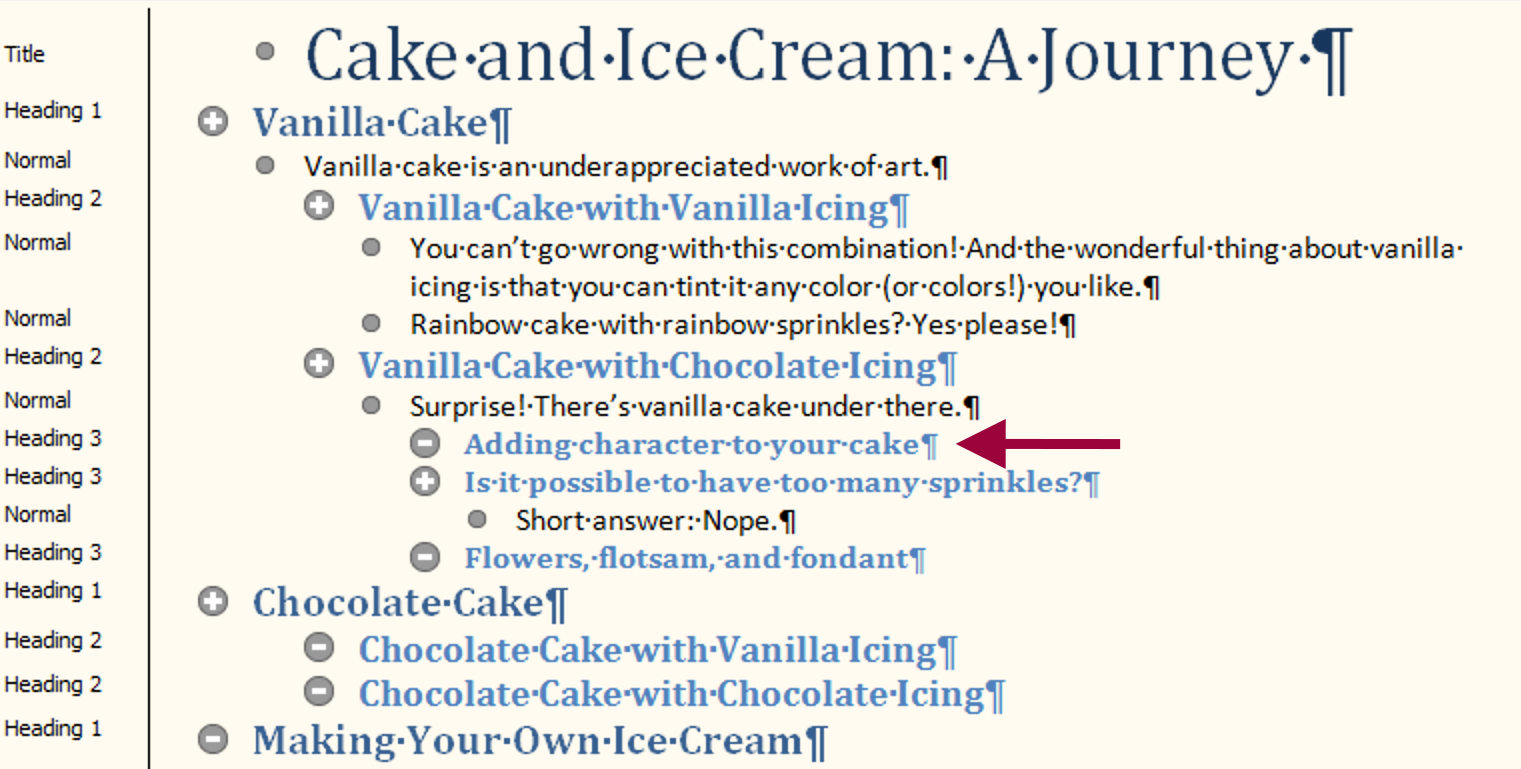
The gray circles act as “handles” that you can grab with your mouse pointer to select not just the heading or paragraph, but everything below it in the outline hierarchy. Once you’ve selected the content you want, you can
- Move it to a different part of the document by dragging and dropping vertically
- Move it up or down in the hierarchy by dragging and dropping horizontally; by using Shift-Tab to promote and Tab to demote; or by changing heading levels in the Styles dropdown as needed
As an example, suppose you decide that Adding Character to Your Cake (currently Heading 3) should be its own section, on the same level as Vanilla Cake and Chocolate Cake (Heading 1) and should appear between Chocolate Cake and Making Your Own Ice Cream:
You also want the 2 following headings to be subheadings of Adding Character to Your Cake. You can accomplish all of this with simple drag-and-drop! (But you’ll still have to change the case of headings yourself, if necessary.)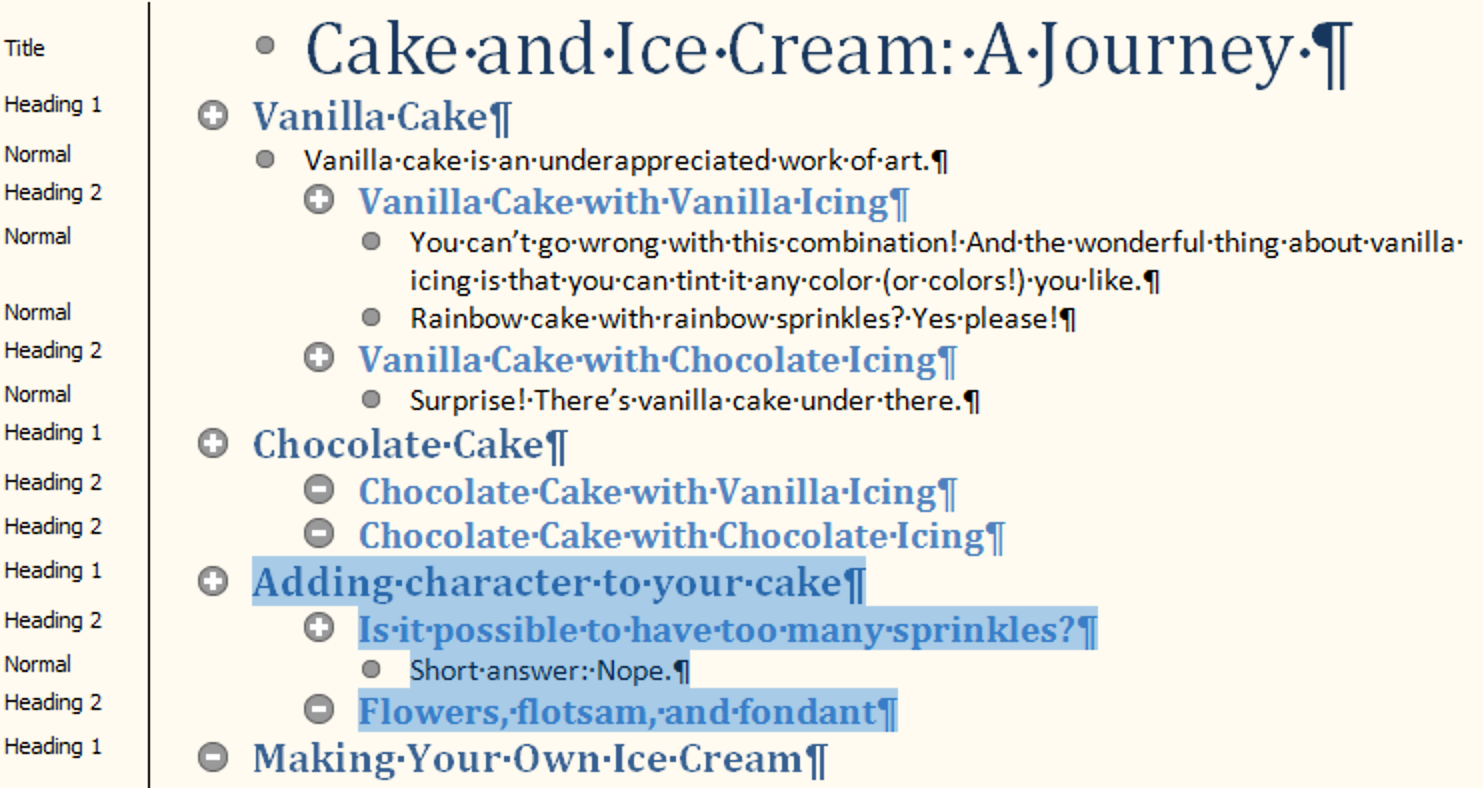
The beauty of Outline view is that you don’t have to scroll through a long document to select whole sections of it; just clicking on a heading’s “handle” selects both it and everything below it in the document hierarchy. This makes it harder to accidentally miss, misplace, or delete part of a section, while still allowing you to work at whichever level is needed.
If you’re an eXtyles user, you may have wondered why we build non-default Outline level values into your paragraph styles for headings and other elements. This Word Tip is (one of the reasons) why!
But Wait, There’s More!
Have you ever noticed that there are usually at least two different ways to accomplish the same thing in Word? Stay tuned for the first Word Tip of the new year …
Have an intractable Word problem you’d love to solve? Have a clever tip to share? Send it to us at [email protected]!
It’s <br/> Time
 As you may have guessed from the dateline of this issue, our Newsletter team is taking a little end-of-year break. Inera <News/> returns in January with the first issue of 2019!